How to Fix a Burnt Socket in 2026?

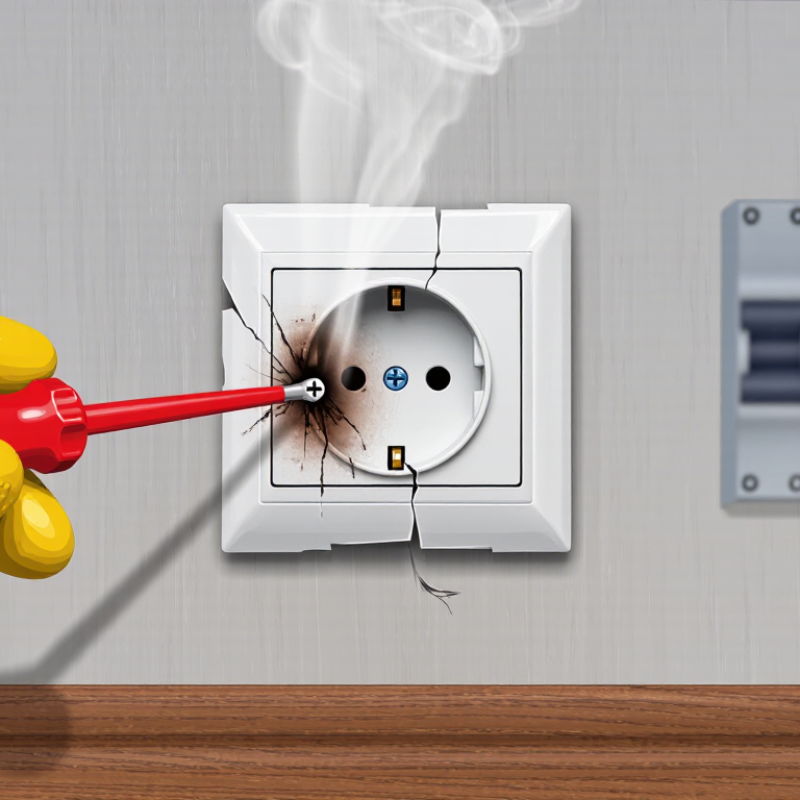
A burnt outlet is more than an ugly wall mark. It can signal loose wiring, an overloaded circuit, or a failing connection behind the plate. When you notice a burn in socket, stop using that outlet immediately. Do not plug in another appliance to test it. A warm faceplate, sharp plastic smell, crackling sound, or brown discoloration needs prompt attention.

This guide explains how to fix a burnt socket in 2026, while keeping safety ahead of convenience. Turn off the correct circuit breaker, then verify the outlet is dead with a properly rated voltage tester. Never rely on the switch position alone. Remove the cover only if you are trained and comfortable working around electrical wiring. Melted insulation, blackened terminals, loose copper, or heat damage inside the wall usually requires a licensed electrician. The damaged outlet may not be the real source.

A qualified professional will inspect the receptacle, wiring, breaker, grounding, and circuit load. They may find an undersized wire, a loose terminal screw, or an appliance drawing excessive current. Replacement should match the circuit rating and local electrical requirements. Do not simply install a higher-rated outlet or stronger breaker. That shortcut can hide a dangerous overload. Sometimes, the first assumption is wrong. A scorched socket can reflect damage upstream or downstream. Careful testing matters more than appearance. If smoke, sparks, or a burning odor continues, leave the area and contact emergency services. Repairing electrical damage is not a place for guesswork.
How to Fix a Burnt Socket in 2026?

Identifying the Causes and Warning Signs of a Burnt Electrical Socket

A burnt electrical socket often gives warning signs before it fails completely. Look for brown or black marks around the faceplate, melted plastic, loose outlets, or a sharp burnt-plastic smell. Warmth is another warning. A socket should never feel hot during normal use. Buzzing, crackling, flickering lights, and repeated circuit trips also deserve immediate attention. These symptoms may indicate loose connections, overloaded circuits, damaged wiring, or a failing internal contact.

Turn off the circuit breaker before touching the socket. Do not keep using it or repeatedly reset the breaker. A burnt socket should usually be replaced, not cleaned and reused. However, the visible damage may be only the surface problem. Heat can travel into the terminals and surrounding wires. A qualified electrician should inspect the conductors, box, grounding, and circuit load. Electrical work must follow local safety codes.

In practical inspections, loose terminal screws are a common cause of heat buildup. Push-in connections, aging insulation, and high-wattage appliances can create similar trouble. Never install a higher-rated fuse or breaker to stop trips. That can hide a dangerous overload. I have seen people blame one appliance too quickly. Sometimes the socket is worn, while the real fault is upstream. A careful inspection matters more than appearance. Even a socket with light discoloration may need replacement. Safety checks can feel excessive, but guessing here is a poor repair strategy.

Turning Off Power and Preparing for a Safe Socket Inspection

How to Fix a Burnt Socket in 2026?

A burnt socket demands caution, not curiosity. Turn off the circuit breaker controlling that outlet before touching the wall plate. If the circuit is unclear, switch off the main supply and keep others away from the panel. Label the breaker if possible. Do not rely on a light switch, because it may not disconnect every conductor. A dark room is safer than a live circuit.

Test the socket with a properly rated voltage tester. Test the tester on a known live source before and after checking the outlet. This simple step confirms that the device works. Wear dry shoes, keep your hands dry, and use a flashlight instead of a candle. Look for melted plastic, brown marks, loose screws, or a sharp burnt-plastic smell. Do not remove the socket if it is hot, smoking, crackling, or damp.

A damaged socket can hide heat damage inside the wall. That part is easy to underestimate. I would not reuse it, even if the marks seem small. Photograph the condition after power is isolated, then arrange an inspection by a qualified electrician. They can check the wiring, terminals, grounding, and circuit load. Avoid pushing wires back into place or installing a replacement without identifying the cause. A new socket may only conceal an older fault.

Removing the Damaged Socket and Checking the Wiring

Before removing a burnt socket, switch off the correct breaker and verify the circuit is dead with a tested voltage tester. Do not rely on the wall switch. Remove the cover plate, loosen the mounting screws, and pull the socket forward without forcing it. Photograph the existing connections first. It helps prevent wiring mistakes, though photographs can miss hidden damage.

Inspect the socket body, terminals, insulation, and the first several inches of each conductor. Look for melted insulation, dark copper, brittle wire, loose terminals, or heat marks inside the box. Burnt copper should not be reused. A qualified electrician may need to cut back the conductor until clean metal appears, then install a properly rated replacement socket. Tighten terminals according to the device instructions, not by guesswork. That small detail is easy to overlook.

NFPA’s Electrical Fires report found about 24,200 U.S. home structure fires annually involved electrical distribution or lighting equipment from 2016 to 2020. These fires caused approximately 295 deaths, 1,050 injuries, and $1.2 billion in property damage. The figures show why checking the wiring matters more than simply replacing a blackened faceplate. If insulation extends deep into the box, the box is damaged, or the breaker trips again, stop work and call a licensed electrician. I would rather leave one repair unfinished than hide a fault behind a new socket.

How to Fix a Burnt Socket in 2026? - Removing the Damaged Socket and Checking the Wiring

Step Inspection or Action What to Check Normal Finding Unsafe Finding or Required Response
1 Stop Using the Outlet Unplug all appliances and stop using the socket immediately if there is a burning smell, smoke, crackling, heat, discoloration, or visible melting. No further use until the cause has been identified. If smoke or flames are present, leave the area and contact emergency services. Do not pour water on energized electrical equipment.
2 Switch Off Power Turn off the circuit breaker that supplies the outlet. If the correct breaker is unknown, switch off the main disconnect only if it can be done safely. The circuit is isolated before the cover or socket is touched. Never rely only on a wall switch, appliance switch, or the assumption that a circuit is dead.
3 Verify De-Energization Use a properly rated voltage tester on the outlet slots and, where accessible, between each conductor and the grounding point. Test the tester on a known live source before and after checking. No voltage is detected at every relevant point. If any voltage is detected, stop work and have a qualified electrician identify the correct circuit and supply arrangement.
4 Assess the Damage Remove the cover plate only after power is verified off. Look for melted plastic, charred insulation, loose terminals, corrosion, heat damage, or discoloration inside the electrical box. Damage is limited to a replaceable receptacle and the conductors remain clean, flexible, and intact. Burn marks extending into the box, damaged insulation, brittle wires, moisture, or heat-damaged framing require professional assessment.
5 Document the Wiring Before disconnecting anything, take a clear photograph and note which conductors are connected to line, load, neutral, and ground terminals. Conductors and terminal positions are clearly identified. Do not guess conductor functions from color alone, especially in older or altered installations.
6 Inspect the Conductors Check for exposed copper, darkened copper, loose strands, nicks, melted insulation, overheated wire connectors, and signs of arcing. Insulation is intact, copper is clean, and conductors are long enough to reconnect without strain. Do not reuse wire with heat-damaged insulation or severely oxidized copper. A licensed electrician should repair or replace damaged cable.
7 Check Circuit Loading Consider whether high-power appliances, plug-in heaters, extension cords, adapters, or multiple loads were used on the circuit. The connected load is appropriate for the circuit and the receptacle rating. Repeated overheating may indicate overload, a loose connection, a failing receptacle, or an incorrect circuit configuration—not merely a defective faceplate.
8 Remove the Damaged Socket With power isolated and verified off, loosen the terminal screws, release the conductors, and remove the damaged receptacle without pulling or twisting the cable. The conductors remain undamaged and the electrical box is secure. Stop if the box is loose, cracked, overcrowded, severely burned, or the conductors cannot be safely released.
9 Prepare the Replacement Use a receptacle with the correct voltage, amperage, grounding arrangement, and required protection for the location. Follow the applicable local electrical code. The replacement rating matches the circuit and installation location. Do not install a higher-rated receptacle to compensate for an undersized circuit. Do not install standard equipment where special protection is required.
10 Reconnect the Wiring Terminate conductors securely according to the documented configuration and the receptacle instructions. Keep the grounding conductor connected to the grounding terminal and bond the metal box when required. Connections are tight, properly positioned, and free from exposed excess copper outside the terminal area. Avoid loose screw terminals, doubled conductors under terminals not designed for them, back-wire connections used contrary to instructions, and damaged conductors.
11 Reassemble Carefully Fold conductors gently into the box, secure the receptacle without crushing wires, and install a sound cover plate. The receptacle is firmly mounted, aligned, and not warm or loose when handled after power is restored. Do not force the device into an overcrowded box or leave the wiring exposed.
12 Restore and Test Restore power and use an appropriate receptacle tester or meter to check polarity, grounding, and expected voltage. Test any required protective device using its test button. Polarity, grounding, voltage, and protective-device operation are correct. If the breaker trips, the outlet heats up, buzzing returns, or testing shows an abnormal result, switch power off and call a qualified electrician.
13 Monitor the Repair For the first several uses, watch for warmth, odor, discoloration, buzzing, arcing, or intermittent power. The socket remains cool under normal use and operates consistently. Any recurring heat or smell indicates an unresolved fault; discontinue use and arrange a professional inspection.
14 When to Hire a Professional Seek a licensed electrician when damage extends beyond the receptacle, wiring is aluminum or unfamiliar, the circuit trips repeatedly, moisture is involved, or the installation is old or modified. Professional inspection confirms that the wiring, protection, box, and circuit capacity are suitable. Do not perform live electrical work or continue troubleshooting when the fault source is uncertain.

Installing a Compatible Replacement Socket Correctly

A burnt socket is often a warning, not just a cosmetic defect. Turn off the circuit breaker, then verify the wires are dead with a reliable voltage tester. Remove the damaged socket only after checking for melted insulation, loose terminals, or darkened copper. Heat marks may extend behind the visible fitting.

Choose a compatible replacement socket with the correct voltage, current, lamp-base size, and heat rating. Match the mounting style and wire terminals carefully. Connect the live wire to the brass-colored terminal and the neutral wire to the silver-colored terminal. Attach the ground wire where required.

Tighten each terminal firmly, but avoid crushing the conductor. A socket that fits physically may still be electrically unsuitable. A mistake is easy to make.

Tips: Cut back brittle or discolored wire until clean copper appears. Do not reuse scorched insulation. Keep wires away from sharp edges and secure the socket without forcing it into place. Before restoring power, check that no copper strands are exposed and that the socket sits firmly. Test the light briefly, then switch it off and inspect for warmth or unusual odor. A slight mistake in wire identification can create serious heat. If the wiring is heavily damaged, the breaker trips, or you cannot confirm compatibility, stop and contact a qualified electrician. A visual inspection alone is not enough.

Testing the Repair and Knowing When to Call a Licensed Electrician

How to Fix a Burnt Socket in 2026?

A burnt socket is not merely an ugly outlet. Heat may have damaged terminals, insulation, or wiring behind the wall. The NFPA reports that electrical distribution and lighting equipment caused about 31,400 home fires annually from 2015 to 2019. Those fires caused approximately 470 deaths and $1.3 billion in property damage. Turn off the circuit breaker before touching the cover. Verify the outlet is dead with a properly rated voltage tester. Do not trust the breaker position alone. A clean voltage reading can still mislead if the tester is used incorrectly.

If the socket has melted plastic, blackened wires, a burning smell, or loose connections, replacement may not be enough. A qualified electrician should inspect the cable, box, grounding, and breaker. Call one immediately if copper insulation is brittle, the box is scorched, or the breaker trips again. Never energize a socket with exposed conductors. After a competent repair, test voltage, polarity, grounding, and secure operation. Avoid plugging in a high-load appliance during the first check. I would also document the damage with photographs. It sounds excessive, but it helps reveal patterns that a quick repair can hide.

Tips: Keep the circuit off until the cause is understood. Do not reuse heat-damaged parts. Stop if the wiring feels loose or confusing. Local electrical rules may require permits or inspection. If you feel rushed, that is a warning sign. Calling a licensed electrician is usually cheaper than correcting hidden fire damage later.

How to Fix a Burnt Socket in 2026? Testing the Repair and Knowing When to Call a Licensed Electrician

A healthy North American 120-volt receptacle normally measures approximately 120 V between line and neutral, approximately 120 V between line and ground, and close to 0 V between neutral and ground. These are reference readings, not permission to work on energized wiring.

Turn off the circuit breaker and verify that the receptacle is de-energized before replacing a damaged socket. Stop and call a licensed electrician if you see melted insulation, charred wiring, loose connections, repeated breaker trips, smoke, heat, or damage inside the electrical box. A voltage reading alone cannot confirm that a burnt socket is safe.

Go to Top